 As of this week, adding a Google map, or even better, your Google “MyMaps”, to your webpage is a snap (pardon the pun). You know how simple it is to embed a youTube video into your blog? Well, it’s that simple. Here’s a short tutorial to show you how simple it actually is. We’ll create a custom google MyMap, add a Mapplet, embed some photos from our flickr account, save the map, and embed it within a website (in this article)… no problemmo! To finish I’ll offer up a couple of photo geotagging tools for those of you with GPS-enabled cell phones and a tool for mannual geotagging for those with no access to GPS. If you enjoy Google maps, flickr, and geotagging photos then this tutorial is for you!
I’m assuming you have a Google account and that you are somewhat familiar with Google Maps. You will also need to obtain a Google maps API key using your Google account options. If this scares you then this may be a bit too much for you!
- Sign in to your google account then proceed to google.com/maps.
- Click on “MyMaps” link
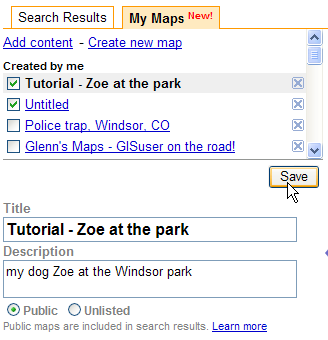
- Then, create a new map (click the link “create a new map” just below where it says MyMaps (left)

- Add a title and a description – for this tutorial I’ll create a map showing my dog (Zoe) at the park.

- Now I’m going to leverage the Google Mapplets functionality to add my photos from my flickr account to my custom map!
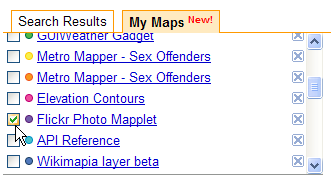
A list of some of the mapplets that I’ve loaded - I’ve already loaded the flickr add photo mapplet, however, if you need this simply click on the add content link and search through tons of very cool mapplets that you are freely available to add to your maps. Mapplets enable you to add many different things to your custom map, like real estate listings, contour lines, photos, weather data, POIs, or ??
- I now can view all my geolocated photos on my custom map
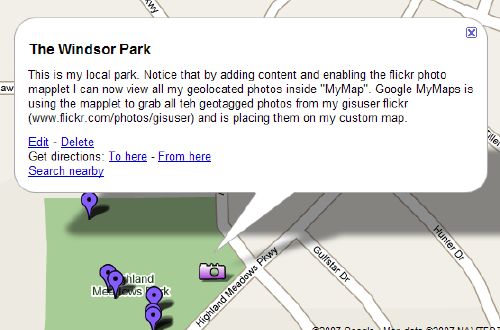
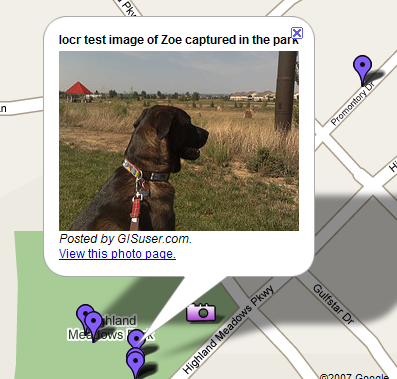
A bubble icon appears wherever one of my geotagged photos from flickr is located. Click the icon and the photo appears! - Save the map and you can access it or share it whenever you want
- Finally, this map can be easily embedded into your blog or website. Simply click the “Link to this page” on the far right, grab the code, embed into your website.
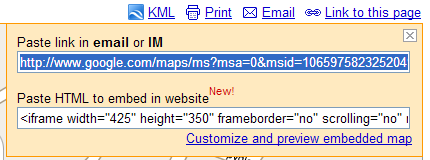
Link to the page, copy and paste the code into your website – the actual Google Map is embedded below. Unfortunately the map seems to be viewed with better results when using Firefox rather than IE… if you can’t view the map try using Firefox browser if available!
View Larger Map
I can also view this custom map in Google Earth as a KML – simply click the kml icon from within Google Maps. Users can optionally customize the way the map will appear by hitting the “customize” link – then alter the size parameters until you’re satisifed. This option seems to import custom objects that you create in your MyMap (like icons, lines, polygons), however, it wil not bring in other custom features fromm a mapplet, like the flickr photos in the map above – too bad!
Other Options For Geotagging Photos
Need help geotagging your photos? Well, there’s many options available to you. If your fortunate enough to have a GPS-enabled camera phone (like a Nokia 6610, N95, or one of the many Sprint devices) then you should take advantage of a couple of programs that will be very beneficial to you:
– Zonetag – from Yahoo! labs
– locr.com
Both of these applications enable your GPS phone to automatically grab your position from the GPS and will embed geotags into your photo when uploaded to flickr.
Don’t have a GPS-enabled camera? No problem. there’s a handy utility called GeoTagr (http://www.beeloop.com/maps/flickr_geotagr.php). simply navigate to the location where your photo was taken (notice the lat/long is updated in the dialog box). Then simplly grab the provided code and use it as a tag for your photos. Notice the tag “Geotagged” This is a reserved tag that flickr uses to identify photos that have geopositioning attributes. Once you have a collection of geotagged photos in your flickr account use the flickr provided “import your geotagged photos” utility found at http://www.flickr.com/account/geo/import/ (you’ll need to be logged into your flickr account to use this application).

GeoTagr creates “geotagged” code to embed with your flickr photos
Finally, if you have geotagged photos or want to geotag them you can also have some fun usinng panoramio. Upload your geotagged photos or position them within the Panoramio upload utility. You can then view your photos on a map or even within Google Earth (enable the Panoramio Layer withinn G. Earth). Perhaps the biggest gripe I have with using Panoramio is that photos I capture with my Nokia N95 do not seem to contain any GPS coordinates within the EXIF so I still need to manually position them – this was the case with photos I took using locr and zonetag… too bad!
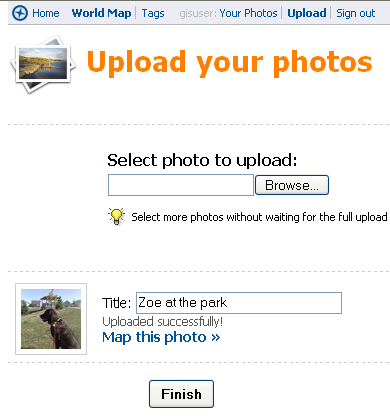
Upload your photos to your Panoramio account – www.panoramio.com
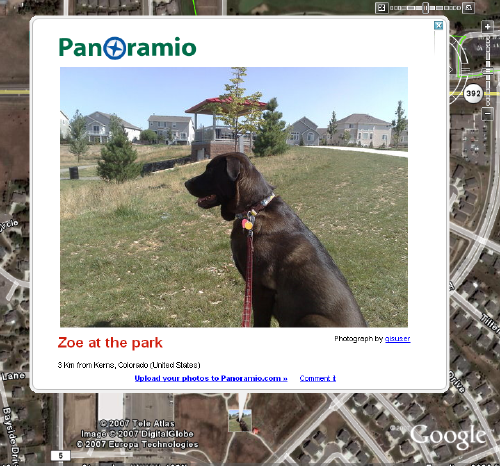
From within Panoramio click the “See in Google Earth now” link and the photo will appear in Google Earth immediately
There are many ways to have fun with google maps, particularly with MyMaps and the new embed in your blog or website functionality. Add geotagged photos into the mix and you can really start creating some very cool apps and resources to share with your friends. Got a tool to share? Please tell me about it (send to editor at gisuser.com)
Some relevant weblinks:
